ListWise

Saturday, December 16, 2006

They Don’t Bite. They Don’t Even Light.

No, I’m not talking about mosquitoes, it’s powder post beetles. And I guess that’s not entirely accurate, because they do bite a little. When I removed the finish floor in the bathroom I found evidence of some beetle damage. It was very limited because they only eat the sap wood and not the heart redwood.

The sap wood is the outer inch or two of wood on a log. As I understand it, this is the part of the tree that is still living and growing. The sap wood supplies nutrients to the upper reaches of the tree. The sap wood is white or yellow in color. The heart wood is the red wood in a redwood tree. It is the tannic acid in the wood that gives it it’s red color. This also makes the wood unpalatable to the beetles.


Notice in the shots above how the beetles devoured the sap wood but left the redwood alone. I have a 15-foot 6X6 beam in the garage that I salvaged from the addition. It has a thin vein of sap wood running along one of the corners. Just as in the board above, that thin vein of sap wood is gone and the rest of the beam is untouched.

This is why I go ape poo-poo over redwood, and why I get so steamed when people knock down the old buildings around here and grind the wood in to saw dust. Even pressure treated wood has it’s failings because the chemicals don’t penetrate the piece of wood after a few inches. If you cut a piece of pressure treated wood, and expose the center, it must be retreated or you have given the bugs an opening.

Friday, December 15, 2006

The Stand & Stare Phase

This is the point when I’ve finished most or all of the demolition and it’s time to start the rebuilding. I may spend hours over the next few weeks just standing in the room and staring. I’m trying to both envision the final product, while at the same time figuring out where to start.

This is a first for me in that I’m changing a rooms function, and it’s probably the most radical change you can make. I making a bathroom from scratch. I’ve done a lot of plumbing, but for the most part I have replaced what was already there. This time, I’m doing it all from scratch. I’m not worried about the supply lines, but the drains are what are giving me pause. I’ve never done drains from scratch and I will need to tie in to the 1985 cast iron drain.

Because a lot of the plumbing will be visible I want to get all the parts before I start the rough in. I should be picking up the marble vanity next week (fingers crossed). The tub has exposed supply and drains. The toilet is a high-tank and I’m going to put the supply 4 or 5 feet up on the wall so it’s a short run to the tank. That will be very visible. The vanity will sit on the sink legs I got and all of the supply and drains will be visible underneath. I’m going to do rigid, nickel plated, copper supply lines as opposed to the modern braided supply lines for the toilet, sink and tub. You will see everything, so it’s important that it all be nicely centered.

It’s all very doable, but it needs to be planned, otherwise I’m going to be staring at it for a long time and it will drive me nuts. In the upstairs bathroom I got the off-set for the high-tank supply line off by a half an inch. No one notices it but when I lay in the tub I see it and I notice. I noticed it an hour ago the same as I noticed it 2 years ago. If I were more ambitious and more wealthy, I might be tempted to spend $120 for a new supply line for the toilet. It bothers me that much. I don’t want to have any of those things happen with this next bathroom. I’m going to be doing a lot of Standing & Staring.

Thursday, December 14, 2006

1909 S. F. Examiner

I was finishing up the last of the demo in the bathroom and I found some parts of the August 12, 1909 edition of the San Francisco Examiner. I had always speculated that the room was first modified in the teens, but it seems it was a few years earlier. There was a sink of some sort in the corner of the room and when they pushed the back wall out 1-foot the sink was removed. The water pipes came up through the floor and they plugged the holes with rolled up pieces of 1909 newspaper.


In the images above, you can see that the newspaper is still in the hole on the right, and then the plug after it was removed. I only got two good pages, and using the word “good” here is a bit of a stretch. This is not anything close to the good condition of the 1915 San Francisco Chronicle I found in the house. The two pages, one sheet front and back, are mostly readable, but there’s not much worth reading really. One side is the sports page and the other is the society page.


I can tell you that Ralph Myers has signed up with the Senators to play for the rest of the season. Johnny Murphy is in the last stages of The White Plague. The popular local fighter has been in Ukiah recuperating. Finally, Los Angles wins it’s first game of the series with the Seals.

The best things are a the 2 full length comic strip on the sports page, and a racy drawing on the society page. The most readable comic has 7 panels and it’s about a man who is trying to quit betting on the horses and is afraid to tell his wife. The language is great.

Man standing on said walk: Well, my horse was scratched yesterday so I didn’t get any action on my coin. I’m gunna quit racing and go home to my spouse – Right now!

Now he’s at home in the kitchen with wife and child.

Man: (Holding a shield in front of himself) Now my dear, let’s arbitrate before you crown me with that rolling pin. You lay down your weapon and I’ll drop my shield. Just one minute, please.

Boy: Give the old man a chance, Ma.

Woman: (holding rolling pin)?

Man: My Dear, I admit that I have been dallying with the races but I’m done and I want you to forgive me. I have $657 and you can take care of it yourself.

Woman: Oh Augustus. I believe you are on the level with that talk.

Boy: (Hiding to one side) She’s falling for it.

Woman: (By herself in the kitchen) I really believe Augustus has quit for good this time. Poor old boy. I’ll hide this bankroll in the sugar jar.

Man: (crawling through the kitchen window) I love my wife, but oh you bankroll.

Man: (Grabbing the sugar jar) Hither, little cuties. Come back to papa.

Man: (racing to his bookie) $50 bones on “Personal” and $50 on “Stanley Fay” to win!

The image on the other side takes up almost a half page. The title is “Marooned” and there is a story that goes with it. There are 6 beautiful young woman in bathing attire, scantly clad for the time. They are on a row boat rowing away from shore. There is a lone man sitting on the sand of a tiny island. The caption underneath says, “I want to see the pirate crew maroon the bloody chief of the pack on a sandy island, a yard square, when it’s low tide, with his arrows left beside him for a mockery”

The first paragraph of the story is ruined, but the second one is in quotes like it is someone talking. It reads, “You see, what with the Suffragettes and the girls getting in on all the jobs there are, and the cleverest ones, too, by gee! and the way she’s coming to boss the whole earth and sky and the water and the land, the crown of the ruler growing right out of the curls of her silken head, maybe, when the stars are a little older my debonair Lady will be getting to see something funny and pitiful of the Love that you know she has never been able laugh at yet or pity or defy.”

The rest of it pretty much reads like that. I think it is a serial story about a band of woman pirates.

Tuesday, December 12, 2006

Dumpster Diving

There is an 1880s Cottage exactly one block away from my house that was bought by the son of some friends of mine over a year ago. Up until a few weeks ago, he has done almost nothing to the place, but that’s fine with me. At least it wasn’t bought by a developer who would bull doze it and build apartments. That is the big fear of all the home owners when ever a property goes up for sale around here. A few weeks back I started to see some activity at the place.

It wasn’t much activity. It looks like they removed some sheet rock and old vinyl flooring. My friends, the parents of the new owner, are really into old houses and have a pretty spectacular one themselves. The woman is on the Historic Preservation Committee, so it’s not like I expected the son to be ripping out any historic details or putting in all new vinyl windows or anything.

Today, though, as I drove by there was another truck and tailor out front filled with debris. There has been a guy there for the past week doing some foundation work on the place. Sticking out of the top of the pile of debris was an old pull out wooden bin from the kitchen. It looks like one of those you would store some sort of dry goods in.

I parked my truck at home and walked back down the street. The workman was under the house and we had a brief, and sort of surreal conversation through one of the foundation vents. All I could see were a pair of muddy knees at the base of the skirting and then I could barley make out a mouth and a pair of eyes through the vent. I asked if I could have the bin and he said sure. So I pulled it out of the trailer and hauled it home.


I’m think maybe I could incorporate it in to the yet to be built bathroom cabinet and use it as a laundry hamper. We’ll see.

Monday, December 11, 2006

Muuuuch Better

It started raining Friday afternoon and hasn’t really stopped but for a few hours here and there. The longest stretch of dry weather was Saturday during the day from about 10 to 4. That’s when I decided to reside the back wall of the bathroom and put in the new window. The only trouble was, that it took me until about 5:30 to finish up.

It wasn’t too bad, really. Around 1:00 the wind really picked up and you could smell rain in the air. The first couple of hours were spent getting things set up, removing the old windows, and starting to remove the old siding. To refresh your memory, I wanted to go from 2 big, double hung windows, down to one small stained glass, single sash window. After I removed the two big windows I found “T Petch” written in pencil on the back side of one of the jambs. This confirmed my suspicion that the windows were original to the 1895 construction, but they were moved during the 1920s apartment cut-up phase. Thomas Petch and his wife were divorced in the teens and he no longer owned the house after that, so the windows must have been from 1895.

I decided to remove and replace siding as I go, rather than remove everything and then start rebuilding. My fear was that I would have a big, gaping hole in the side of the house and then it would start to pour. That didn’t happen, but, as I said, I did have to work in a light rain for the last hour and a half or so. It was those big, widely spaced rain drops you get on the leading edge of a big storm. And it was a big storm. It just poured hard from about 6:00 Saturday evening until early Sunday morning.

There was a Christmas Truck Parade Saturday evening and the people in the parade just got soaked. At this point, you’re probably asking, “What is a Christmas Truck Parade”. Well, it’s pretty much what it sounds like. Remember, this is a small logging town, and people make do with what they have. A lot of the logging trucks, and other kinds of large commercial vehicles are decorated to the hilt by their owners and they drive through town in a long procession.

My friends own a big 1910 Four Square on the parade route and they throw a party every year. I used to think the whole thing was hokey and stupid but now I think it’s kind of fun. The Four Square has a huge front porch and after eating a drinking for a few hours we all pile out on to the porch and hoot and holler as the trucks drive by at 5 miles an hour, each one playing a monotoned rendition of a Jingle Bells on their truck horn. It’s a lot of fun, and after a few glasses of wine it sort of does start to sound like Jingle Bells. {HONK HONK HONK     HONK HONK HONK     HONK HONK HONK HONK HONK} I keep hoping one of the truckers will get ambitions and try to play “Hark! The Herald Angels Sing” or “The 12 Days of Christmas”, or what’s the fast paced one with the tubular bells. That would be a hoot!

Anyway, the new window is in and I really like it. It really changes the little bathroom room a lot. The space seems smaller and bigger at the same time. I kind of screwed up on the siding I bought. I only needed a little bit to fill in what I didn’t have in the way of salvage. I was using an adjacent wall with an identical window as a pattern to determine how much siding I needed to purchase. What I didn’t realize was that the adjacent wall has an extra row of siding because of the way the porch roof slants down further over the bathroom wall. So I now have an extra 12-foot piece of siding that I don’t need. There’s $41 down the drain.

I was able to get everything caulked and puttied so it is water tight and ready for the winter. Now I just need a few days of dry weather so I can paint. I’m thinking…..early March.

Before


After


Before

After

Saturday, December 09, 2006

It Could Have Been Worse

After looking at these pictures, it’s hard to imagine that it could have been worse, but it could have been. First off, no one was injured in the fire. Second, the gray and white Victorian building to the left that didn’t burn to the ground last night houses my friends antique and salvage store. There is extensive water damage, but the building is still standing.


The one that burned was an 1870s building that had been remuddled so many times it looked nothing like an 1870s building. It was basically a stuccoed shell of what it once was. Still, it was not an entirely unattractive building, and it is sad to see it go.

The building housed 3 business, one of which was all set to open in the next week or so. The owners spent a lot of money turning an old video store in to an upscale deli and wine tasting bar. Something tells me it won’t be opening in the next few weeks.

While it’s true there is a silver lining in all this, the fluff piece I wrote yesterday seems all that more fluffy and shallow today.

Friday, December 08, 2006

Happiness Is….

I don’t really remember where this came from. It seems like some 70s, cutesy, positive affirmation thing. Does anyone else remember the “Happiness Is…” thing? Well, I thought I’d update it for HouseBloggers.

All of us go through moments where it’s hard to find the silver lining. Some of us have those moments in a more brutal fashion than others. Somehow, though, you must find something that you can look to and say, "That could have been much worse". Or even if it is as bad as it gets, you need to trick yourself in to thinking that some good will come out of it. Otherwise, you’re likely to end up in a clock tower with a high powered rifle.

So here is “Happiness Is…” HouseBlogger style.

Happiness Is…
Burping in your respirator after a good lunch. Hmmmm!

Happiness Is…
Stepping in dog poop just before you climb a ladder and not realizing it until your on the way down. It’s like a little treat waiting for you on each rung.

Happiness Is…
Waking up to find that the septic tank has not backed up in to your house, but has only backed-up part of the way under your house.

Happiness Is…
A contractor who only shows up one hour late. He's practically on time!

Happiness Is…
Realizing a lot of the wood for the floor is milled wrong and can’t be installed. This means you get to quit early for the day!

Happiness Is…
Getting the cast iron beauty from Ebay delivered broken in to 5 pieces. You get your money back!

Happiness Is…
Windows that let in fresh air even when they’re closed.

Happiness Is…
Toilets that never stop running. If only your car was that good.

Happiness Is…
Knowing that you can answer the question, “What’s plaster taste like”.

Happiness Is…
Knowing that because you own an old house, or one going through major renovations, you always have an excuse to drink.

Happiness Is…
The sweet smell of lead paint bubbling and burning.

Happiness Is…
Having a complete mental map of every isle at the hardware store. Why, most of the employees don't even have that.

Happiness Is…
A plumber that over charges you, but does do good work.

Feel free to add your own.

Thursday, December 07, 2006

Rib Not Lest Ye Be Ribbed

Yesterday I ribbed the 1920s carpenters for their apparent shoddy workmanship when they installed the 2 big windows in the then remodeled scullery. They didn’t nail the windows to the framing of the house. Instead, they nailed the casing to the windows, then installed the windows, and then nailed the casing to the house. The windows themselves aren’t actually nailed to the house.

After I posted that, a few people commented that their windows were done the same way. That got me to thinking that maybe this was a common way to do it. For all I know, this was the most common way to do it. Not only that, but the windows did stay put for 80+ years, so who am I to say it’s wrong.

With that in mind, I’ve decided to install the new stained glass window the same way. It will help out incase the weather is less than perfect on Saturday, which it probably will be. It will just be one less thing I have to do outside. We are scheduled for rain to start Friday evening with showers Saturday and “Few Showers” Sunday.

Today I scrapped, sanded, and primed the bottom three rows of siding that will be staying put on the outside of the house. I can use the interior window casing that I already removed to use as the new exterior casing for the stained glass window. It’s obvious it’s from the 1920s because it is clear, heart redwood, and it is not High Victorian fluted casing like the rest of the house. It’s just flat 1X6 stock. This of course means I have to strip off the googles of layers of paint. It’s probably a good thing I do some paint stripping because I’d almost forgotten what burnt paint smells like. We wouldn’t want that, now would we?

Wednesday, December 06, 2006

Weather Woes

So there not the same weather woes that others are experiencing, they are still woes, none the less. All week I’ve been demo-ing and prepping with nice weather in hopes of installing the "new" stained glass window on the exterior bathroom wall, and now it’s supposed to rain starting Friday.

The plan was to do all the grunt work on Saturday, but if it’s coming down in buckets, that’s not going to happen. A light sprinkle I can deal with. The occasional cloud burst, you know, not the end of the world. Sheets of water coming in sideways – that would be a problem. So, what are we going to get? I wish I knew.

At this point, I’m still moving ahead as if I have a Go for window replacement. Of course, it’s much more that just a window replacement because I will be pretty much residing the whole wall in the process. Only the first 3 rows of siding are staying, and everything else is being replaced.

All the new siding is now prepped and primed and sitting in the shop straddled across the table saw and miter saw. The window is in the butler’s pantry, and all the new 2X4s are waiting in the utility room. I removed all the floor to ceiling beadboard in the bathroom to expose the windows that I will be removing. In doing so, I discovered they weren’t installed very well in the first place.

This is a 1920s hack job when the place was cut up in to apartments. The only thing holding the windows in place is the exterior casing. They just stuck them in the hole and nailed on the casing! The windows aren’t attached to the house at all! A stiff wind could probably take them out. Sheesh! Would a few nails have killed you?

Tuesday, December 05, 2006

Shopping Spree

Ok, what do you get when you cross a drunken sailor with a mad man? I’ll give you a hint. His name is Greg. He lives in The Petch House. And he spends money like a bizarre cross between a mad man and a drunken sailor.

Naturally, I’ve been buying things for the bathroom, but it’s gone beyond that. As I scour Ebay for bathroom things, I see things that I want that aren’t necessarily bathroom related, and I feel compelled to bid on them because they are such a good deal. It’s not like I have money to spare right now, yet I bid anyway. Maybe to some this is normal behavior, but I’m not much of a shopper. I have the restraint and patience of a Nun when it comes to not buying things I want. If anything, I’m The Anti-Shopper.

I watch items in My Ebay sometimes because I’m just curious as to what they will sell for. It’s things I’m not really shopping for, but things I wouldn’t mind having, so I click on the Watch This Item in My Ebay link. Twice over the past few weeks I’ve logged on to Ebay only to see that some of those items were ending in a few minutes with no bids SO I BID ON THEM. This is not normal behavior for me.

Anyway, here are my bathroom purchases of the past few weeks. I'm piling everything up in the dining room so it doesn't get broken or lost. Some of the bedrooms are still a chaotic pile of doors and molding. The attic and garages are completely out of control. Most of these were Ebay purchases, and some were purchased at local shops. The Ebay purchases were all low-ball bids, so I got great deals on them. For me, it doesn’t necessarily have to be exactly what I want, I just have to get it for a good price. It’s the thrill of the hunt that excites me.

A pair of 1890s Swing Arm Wall Sconces with etched glass shades. I’m not sure if the shades are original, but I like them.


Nickel plated, cast brass, 3-arm towel rod. This thing is heavy and solid. The plating is passable, so it will be hung as is. To the left are a set of 4 Victorian swing arm curtain rods. This is one of those items I don’t really need, but they were less than $10 each. I couldn’t afford not to buy them.


In the back is a cup holder/soap dish. Again, it’s nickel/brass. This will need to be replated. In the front are a pair of nickel/brass shelf brackets. There will be a piece of plate glass that will make up the shelf.


This is the ceiling fixture. Not sure about the shade, but it’ll do for now.


These are the brackets that Don at Vintage Plumbing made me. They will need to be plated. Below that is another purchase that I don’t really need….but at that price…..It’s a locking door set that doesn’t fit any door I have. It’s just in beautiful shape, though. It’s like a giant cast iron cabinet pull. Honestly, these may end up going back on Ebay


Some porcelain escutcheon for the sink and tub supply lines. A dollar a piece! How could I say no?


This is the medicine cabinet for the bathroom. You need to use your imagination with this one because it still looks pretty ratty. I bought 2 of them for $35 a few years ago. They came out of a 1880s hotel that was remodeled in 1902, so who knows when they are from. If you can’t use your imagination the next picture is of the other one that is now in the upstairs bathroom.


Still in transit, or to be purchases are a long towel bar, some faucets, and a toilet paper holder. After that, I can start to seriously think about buying tile.
Oh, and I think I've come to an agreement with DEA Bath on the marble vanity and a whole bunch of other bathroom related plumbing crap. More to come on that.

Monday, December 04, 2006

Sorry DCI, I didn’t mean to steal.

As I mentioned a week or so ago, I was down at Almquist Lumber to buy 3 feet of oak for the high-tank toilet frame. While I was there I was amazed to see that they had 1X8 redwood shiplap siding in the same profile as my house. I’m going to be needing a total of about 80 feet to fill in on the back wall of the bathroom after remove the two big windows and put in the small stained glass window.

I have some salvage left, but it’s really the bottom of the barrel stuff, and I knew there would never be enough. I had visions of paying huge sums of money to have 30 or 40 feet custom milled, so you can see why I was thrilled when I saw this stuff at Almquist. They didn’t have much, though. The guy told me they only keep a little in stock for people who need to make repairs. This profile was very popular at the turn of the century and you see it on a lot of homes in the area. Some refer to it as Rustic V Groove Shiplap.

I calculated that I needed 6 pieces 12-feet long, and 10 pieces 5-feet long to fill in after I removed the windows. From the wood shed I was able to get three 12-footers and eight 5-footers. That left me a deficit of three 12-footers and two 5-footers, so today I drove out to Almquist to get the remaining pieces.

I took in a sample and told the guy at the counter I saw some just like it when I was in here last week. He said, “Oh yes, the old redwood stuff. We don’t have much.” To which I said, “Well, I don’t need much”. We went back and found it and it seemed there was even less than before. There were two 14-footers and a few 10-footers, and then some scraps that were no longer than 6-feet. I was getting a littler nervous. I could always put multiple short pieces on a row, but it would look odd on such a small wall. Suddenly, behind some pine siding he found a whole stack of 12-footers. Very nice. We grabbed 3 off the front of the stack, and I grabbed one of the 10-footers, and we headed out to ring it up.

The price was a little less than I was quoted over the phone. It came to $3.21 a foot, and while that’s not cheap, it’s a hell of a lot cheaper than getting it milled. When I got home and started priming it, I found some writing in chalk on one of the 12-footers we pulled off the hidden stack.

Oops! Sorry DCI.

Sunday, December 03, 2006

3D Sketch Up of New bath

If you haven’t tried Google’s Sketch Up, you should. First of all, it’s free, and second of all, it’s pretty damn cool. It took 10 minuets or so to watch the on-line tutorial videos and that’s pretty much all it took to become proficient at making 3D models of the new bathroom.


Above is a 3D mock up of the proposed bathroom. After I did this, I thought about doing it over, because I learned a lot about Sketch Up along the way. This is pretty much to scale, and you can see how tight the space is.

If you have Sketch Up, or if you download it, you can click here and download the SKP file of my bathroom. You can then load the file and twirl it around and play with it.

Saturday, December 02, 2006

More Tile Samples & More Questions


I ordered a sample board from Subwaytile.com and it arrived yesterday. The box contained a thick cardboard display board with 5 tile samples on it. There were 4, 3X6 field tiles, and 1, 3-inch hex tile. Each of the tiles has a label on it indicating which finish it is. There is Pure White, Porcelain, Meringue, and Sand Dollar. The hex tile is also in Meringue. On their web site it says there are 5 sample finishes on the board and the 5th one should be “Alabaster (glossy crackle warm white)”. I don’t see the Alabaster on the board, but that’s fine because I doubt I would be interested in it based on the description.


Also in the box there was a thin, paperboard mailer with another tile sample in it. It was wrapped in bubble wrap and there was some literature along with it. I thought this was the Alabaster, but this tile does not have a “glossy crackle warm white” finish to it. It is the most glossy of all the samples but it is not “crackled”. The Porcelain sample on the sample board has crazing, which I thought was what they meant when they said “crackle”.

To confuse matters more there are 2 price lists. One was for Subwaytile.com and the other was for Subway Ceramics. I went to the Subwaytile.com site and finally figured out what I got. The display board is Subwaytile.com tiles, but the Alabaster sample is just not on it. The other tile sample is Subway Ceramics tile. It is a different company, but it is distributed by Subwaytile.com, or at least that’s what I’m guessing.

If you go to Subwaytile.com there is a Subway Ceramics logo on the right sidebar. You click on that and you go to the Subway Ceramics site. There are no prices on the Subway Ceramics site, or at least I couldn’t find them, and under Information/Ordering it says: Subway Ceramics accepts orders from dealer/showrooms, architects, restoration contractors and designers. Notice it doesn’t say anything about normal people like me. Well, ok, an argument can be made that I’m not normal. Normal or not, though, it doesn’t seem that I can buy directly from Subway Ceramics.

Subway Ceramics offers more colors than Subwaytile.com, but I’m only interested in the white. Subwaytile.com offers a lot more in the way of decorative boarders. Subway Ceramics field tile starts at $14.95 a sq ft, as opposed to the $10.95 a sq ft for the Subwaytile.com tile. Subway Ceramics prices for trim pieces – base, cap, etc. – are very nearly the same as Subwaytile.com. A 3X6 Victorian cap is $11.65 at Subway Ceramics and it is $12.66 at Subwaytile.com. There is only a one cent difference in the price of the 6-inch base tile, but the Subwaytile.com base is much nicer. The Subway Ceramics base is mostly flat with a simple cove at the bottom, while the Subwaytile.com base has a much more detailed profile to it. One odd thing I noticed at Subway Ceramics site was when you are looking at color samples they show what looks like a 6X6 fancy Victorian base tile, but that tile is not listed anywhere else on their site, nor is it on the price list.


Finally, there is the quality of the tile itself. Both are very nice. It is difficult to judge an entire line of tile based on a few samples. If I had to pick one and say which one is nicer, it would be tough. The glaze on some of the Subwaytile.com tiles sort of oozes over the edge a bit. I don’t think this would have any impact on the installation, it’s just something I noticed. Also, the Subway Ceramics tile is pure white under the glaze, where the Subwaytile.com tile looks grayish brown with little specks of impurities in it. Does that have any impact on the quality of the tile? Who knows.

In the plus column for Subwaytile.com, the glaze on top of the tile is flatter. It looks like the glaze on the Subway Ceramics tile has pooled slightly at the edges. It is very subtle, and it’s not really something you would notice once it’s installed. Since I only have one sample of the Subway Ceramics tile, I would say that it is best compared to the “Pure White” sample of the Subwaytile.com tile. When comparing these 2 side by side, I like the Subwaytile.com tile better. Both are a gloss tile, but the Subway Ceramics tile looks to be a little more glossy. The glaze looks a little more generic. Even though the Subwaytile.com tile is glossy it looks to be half way between a matte finish and a standard gloss finish of other tiles I’ve seen. It’s glossy without being really shiny.

Thursday, November 30, 2006

Tile Scheme or Tile Plan: You Decide

So, if you recall I’ve been trying to come up with a way to have a claw foot tub with a shower, but not have the shower ring. I’m just not a big fan of those things. The tub is going to go at the back of the small bathroom, and a shower curtain will be drawn in front of it. This will keep water from splashing out in to the bathroom, just as with a regular tub with shower. The problem has been the other three walls and the floor beneath the tub.

Naturally, water will end up other places aside from the tub drain at the bottom of the tub. The question has been, how much water. I think more than 75% of the water will go down the tub drain, with the majority of the remaining water hitting the wall on the side of the tub.

I could do a standard shower stall but I don’t want it to look like a tub sitting in a shower stall. The run-of-the-mill modern tiled shower stall has a 6-inch curb in front of it, and the floor is steeply slanted all around the drain. The drain is a 2 part drain, and the whole thing is large and imposing. Not what I want at all.

So what to do, what to do? That has been the big question. I went to a few tile forums and asked about drains for steam rooms. I figured that was a good compromise. Trying to explain what I wanted to do would get me a bunch of answers like, “Why the heck do you want to do that?”. Not very helpful. I figured asking about what type of floor drain would be installed in a steam room might get some creative juices flowing amongst the tile guys and maybe I could come up with an alternative to the 6-inch curb in the bathroom.

Well, I got nothing. One person suggested I use a good membrane. That one person was the only person who responded. I was asking about a drain, and I was told to use a membrane. Membranes are used in shower stall installations. It was like I was asking a zombie to drive a car and all I got was the standard “Groooan”. I can’t fault the tile guys. Few of them want or need to be creative. They know how to do shower stalls and they can whip them out pretty fast and move on to the next job. Badda-boom-badda-bing.

I Googled until my fingers where soar and I got 50 variations – using the word “variation” is a stretch here – but I got 50 variations on the same thing. According to the internet, there is only one way to control water on the floor of a bathroom. It is a 6-inch curbed shower stall. Apparently, without that you are screwed.

I began to wonder again how they used to do it in the days before synthetic membranes. The Romans where big on bath houses, and I’ve seen pre-WWII shower stalls. So how did they do it? Well, I found one reference to a lead lined shower stall. It was pretty much two words in a long description of a modern shower stall with a membrane and a 6-inch curb, so it did me little good. Even if it was step-by-step instructions I doubt I’m going to be getting my hands on a lead sheets anytime soon.

So I thought and I thought and I thought and I came up with The Minnesota Mining & Manufacturing Co. For those of you who don’t know, the 3 “Ms” in The 3M Corp stand for The Minnesota Mining & Manufacturing Co. Thank you very much Stucco House for that little bit of trivia. Now I ask you, have you ever purchased a bad 3M product? I’m willing to be you haven’t.

In my opinion, 3M is the Pantheon of Corporate America. These are the people who brought us Scotch Tape and Post-It Notes, not to mention a plethora of other adhesive and non-adhesive products. I guarantee you every single one of those products works exactly as advertised. It either meets or exceeds your expectations. It’s probably something you’ve never noticed before and that’s the beauty of the company. They don’t ram “The Greatness” of their products down your throat with advertising, they just make great products.

Any way, the miracle 3M product I’m going to use 3M™ Marine Adhesive/Sealant 5200 to seal the tiles in the shower area. I will do a gentle slope towards a standard floor drain, and a slight curb with quarter round tile. The floor of the bath area will be the 3X6 subway tile, as opposed to the 1-inch hex tile that will be on the rest of the floor.

When you Google the 3M™ Marine Adhesive/Sealant 5200 - and you will - you will see things like “EXTREMELY PERMANENT”, “Can be used below the water line”, “cures with no shrinking”, “Stays flexible and allows for structural movement”, and “Stress caused by shock, vibration, swelling or shrinking is effectively absorbed”.

Now, if this were any other product but a 3M product I would be saying to myself, “Yea, right, I don’t think so”. But I’m not saying that. Me, the born skeptic, actually believes something that is written about a product on a retail internet site. Snowballs may actually be flying through hell as I write. To go one step further, I will be using the membrane under the thinnest, backboard, or the mud job - what ever I decide. It won’t be the steeply pitched floor with the 6-inch curb and the 2 part shower drain. No I won’t be doing that. My first line of defense will be the 3M™ Marine Adhesive/Sealant 5200, and it will hold.

So why doesn’t everybody use the 3M™ Marine Adhesive/Sealant 5200? Because it’s $10 for a standard sized caulking tube. That’s ok, though. I’m not going to be paying a tile setter $50 and hour so I can afford the $150 worth of caulk. Big whoop! Of course, there is a bit more to this plan, or is it s scheme, that I won’t go in to now. I really think I’m on to something here, though. If I do this right, it may even be better than what all the tile guys are doing with their membranes and their 6-inch curbs.

Wednesday, November 29, 2006

Decisions on Sashes

Well, I made up my mind – for now anyway – that the new window with the stained glass sash is going to be centered horizontally on the wall, but it will be lifted slightly higher than the other sash. Here’s the picture again for reference.


The window on the left is 42-inches off the floor on the interior side. Once it’s trimmed out that will be more like 38-inches, which would put it just above the 36-inch wainscoting that I had originally planned for the little mud room.

If I move the new window up one row of siding that will lift it another 7 or 8 inches. If I do 36-inch subway tile in the bathroom that will leave me plenty of room in between the base of the window and the top of the tile to mount a towel bar if I want to.

Before I start the window installation I need to make sure I have all the siding ready to go. Today was clear blue skies with brutally cold temperatures (It dropped down to 33 last night! Brrr!), but that could change in a moments notice. Unless I want to resort to plastic sheeting, I need to have all my ducks in a row before I pull nail-one.

So it was out to the wood shed today to see what I had in the way of siding. There is still some out there, but I am really down to the dregs of the siding selection. There is also the issue of having 2 kinds of siding, that while they may look identical, do in fact have slightly different profiles. I’m going to have to be very careful with the selection process.

I figured I need a total of 6 – 11.5 foot pieces, and 10 – 5 foot pieces to finish out the side once the new window is in place. I was able to scrounge from the shed 3 – 11.5 foot pieces, and 10 - 5 foot pieces. That’s not bad, but those numbers will almost assuredly drop over the next few days as I begin prep them. And they need a lot of prep. As I said, this is pretty much the bottom of the barrel for lengths of this size. They all need to be trimmed to length, puttied, and sanded. I also want to prime and paint them before they are installed. I haven’t even thought about where I’m going to put all of this stuff while I’m painting it.

Anyway, if I can use all that I scrounged from the shed, that means I only need 3 more 11.5 footers. We’ll say 36 more feet. I called down to Almquist lumber yesterday to see what the price was on the siding I saw there a week a go. You know you’re dealing with a real lumber yard when they give you the price in Board Feet and not Lineal Feet. The siding is $4.92 a board foot, which somehow equates to $3.28 a lineal foot. I’ve had the conversion explained to me a few times, but it’s something I use so little I forget it almost as soon as I’m told it.

So that works out to be $126.64 for the 36 feet I need. If I had to buy all of it then it would come to $418.62. Needless to say, that’s a big difference, and it’s an incentive to use as much of my salvage stuff as possible, regardless of what it takes to make it look good. I figure it’s going to take me the rest of the week and part of the weekend to get it all prepped. I’ll then need to buy the new stuff and prime and paint it. Maybe a week from this Saturday I can reframe the wall and put in the new window.

Tuesday, November 28, 2006

The New Bathroom Window

I built the window Sunday and Monday, and then painted it today. The sash is an English stained glass window I got at a salvage yard a few years ago, and the jamb and sill are from a double hung sash window that came out of the 2 story addition I took down a few years back.


The colors are a little washed out, but that is same Clarey Sage and the Fired Brick that I used on the rest of the house. I’m generally pleased with the way the window came out. This is only my second window I’ve made. I did screw up on the sill a bit, though. I had to dismantle the old double hung window and re-cut everything for the smaller single stained glass sash. I cut the sill too narrow for some reason. It should be ok because the narrow side will be on the inside of the house and it will be hidden behind the window stool and apron. Those are the parts that make up the interior trim at the base of the window.


I bought two matching sashes, and as you can see in the picture above, one is already installed. The little wall with the window is what I’m calling the mud room, but to be honest, it’s not much of a mud room. The brown wall to the right of that is going to be the downstairs bathroom. I’m going to be getting rid of those two big windows and replacing them with the new window I just made.

At first the plan was to just center the new window on that brown wall. It would be better, though, if I shifted it to the left. Essentially, the new window would replace the big window on the left, and the big window on the right would go away. I would then fill in the missing siding.

The reason that would work better is because the tub will be at the far end of the room and I want to leave some uninterrupted wall space for a towel rod and maybe a cloths hamper or something. It is a small bathroom and the opposite wall is going to be occupied by the sink and toilet. My mind, however, likes symmetry. It’s seems the right thing to do would be to center the window on the wall and then just work around it when it comes to interior design.

On the other hand, if I don’t center the window, maybe to have the window off-set on the wall will be one of those fun little quirks of old houses. I’m not sure this is the right house for odd little quirks, though. The off-set window would be a bit out of place. The over-all massing of the house is asymmetrical, but all windows and doors are centered on their respective walls.

Another thought is to center it on the wall, but set it up higher on the wall. I have a similar size stained glass window in the front parlor that is positioned about 5 feet up on the wall. That window is original to the 1895 construction, so there is precedence. Much thought will be given to this over the next few days.

Monday, November 27, 2006

Don To The Rescue

I contacted Don Hooper, the owner of Vintage Plumbing, about 2 weeks ago asking about wall brackets to go with my sink legs. I had bought a pair of 1890s, nickel plated sink legs on Ebay to use in the downstairs bathroom. The legs support the front two corners of a marble vanity, and then there should be brackets mounted to the wall to support the other two comers.

I’ve since discovered that the wall brackets have a small post on the top that accepts a hole on the underside of the vanity. This is what holds the vanity to the wall. Once the backsplash is in place, the only way to get the vanity away from the wall without disassembling it, would be to break the marble. The brackets, it seem, play a larger role than just helping to support the marble.

Anyway, I contacted Don 2 weeks ago asking if he had any brackets, or if he knew where I could get some. He emailed me back within minutes and said he makes a reproduction pair and he’d be happy to sell me a set if he still had any. We agreed on a price and I waited for him to contact me telling me he had a pair for me. I never heard back from him.

Even after a few days the pessimist inside me began to doubt I would ever hear from Don again. His site is pretty popular, and being that he is located in LA, I’m sure he gets a lot of local traffic. Also, judging from his site, he mostly deals in high-end stuff for big spenders, and I just figured me and my little request from a couple of brackets might be too mundane. Woa-is-me, right?

On Friday, just a few days ago, I decided I’d better try and find an alternative to Don Hooper. The brackets are roughly 1 X 5 inches, and are a fairly simple design. I started searching for fabricators to make me a pair. I needed to find someone who does non-industrial fabrication. A lot of places I saw on-line were fabricating parts for production machinery and industry prototypes. Not really what I needed.

I eventually found Vulcan Metals in St. Louis, MO. Their site said they would fabricate anything from as small as a pencil holder to as large as hotel railings. Judging from the pictures they do a lot of high-end residential railings, bar BQs, tables, chairs, etc. I shot off an email to one of their estimators, along with a crude drawing of what I needed.

Well, wouldn't you know it, later that day I got an email from Don at Vintage Plumbing saying he just located a pair! I shot off another email to Vulcan saying, “Oops, never mind”. I told Don I’d take them. He gave me two prices. One was for finished but unplated brass, and the other was for finished and nickel plated brass. As it turns out I need to get the waste pipes for the claw foot tub nickel plated, so I said I’d take them unplated and just add them in when I plated the pipes.

I asked him about a good nickel plater and he suggested Astro Chrome & Polishing in Van Nuys, CA. He said he’s been going there for 30 years, and people ship stuff to them all the time. That is exactly what I want to here. He suggested that I request copper pre plating before the nickel plating for better results when having something replated. I don’t understand it exactly, but it seems the copper adheres better to a already polished surface than the nickel does. Works for me.

Next all I need is the marble skirting, oh, and the marble vanity itself. I’m hoping to pick up the vanity in a week or two, and after that I’ll know what size skirting to get. It’ll feel good to have this out of the way.

Saturday, November 25, 2006

Done With The High-Tank

I was able to finish the mounting frame for the high-tank today. I said yesterday that is was “simple mortis and tenon construction”. I didn’t mean to say that making mortise and tenons is simple, only that the style they used was simple. I actually had a little trouble with making the tenons.

I desperately need a better table saw. My $150 POS table saw is just not going to cut it anymore. I was at Sears today buying a router bit for the tank frame and I drooled over several high-end table saws they had. The price is one thing, but the other is space. Some of these saws are as big as a dining room table. My little Model T sized garages don’t really accommodate big pieces of equipment like that. I’ll have to do something though.


Here’s the tank with the new frame. The stain is not an exact match, but it’s close enough. The reason I say the mortise and tenon joints are simple is because instead of making a mortise just big enough for the tenon, they cut a groove down the entire length of the board. Once the groove is there, the tenon can pretty much go in any place. There is a lot less measuring, and it makes it pretty simple to do. The whole thing is done on the table saw. I get the feeling these tanks were really cranked out of the factory way back when. It didn’t take a lot of skill, and one person could produce several in a day.


Here is a real mortise and tenon joint. The mortise is the pocket and the tenon is the opposing slender piece that slides in. On the frame, instead doing a nice pocket like that, they just milled a groove the entire length of the board. Then just slap in the tenon, glue it up, and cut off any excess. Next!

Friday, November 24, 2006

More High-Tank High-Jinx

When I bought the tank last year it was stuffed with an odd assortment of trim pieces and plumbing parts. I didn’t realize it until I got home, that even though I had gotten all of these “extra” parts, the toilet tank was, in fact, incomplete.

The high-tank I have installed in the upstairs bathroom mounts to the wall on a cleat that is not seen once the tank is in place. You mount the cleat on to the wall and then the tank hangs from it. The tank I bought last year, the one I just refinished, mounts in a slightly different manner.

The “new” tank has a 4 part trim piece that gets mounted to the wall, and then there are two hooks on the tank that mount on to the trim piece. The trim piece is kind of like a picture frame for the tank. It has some mill work on it, and it is exposed on three sides of the tank. I said it’s a 4 part trim piece, but I only got two of the parts, and they were both the same part, so really I only got one of the 4 parts of the frame.

2 Left Sides Don’t Make a Right


Hooks on the back of the tank.


So today I started the construction of the new “mounting frame”. On Wednesday I went to Almquist lumber to pick up some oak. Almquist is pretty much the only lumber yard around here that carries anything but pine, fir, or redwood. They have just an amazing assortment of wood. I’m really not interested in all the exotic woods they carry, but I was happy to see that they have redwood 1X8 siding that matches the profile of my house, and they have curly and burl redwood in stock! All I needed was 3-feet of 1X6 oak, but I felt like a kid in a candy store walking around the place.


Anyway, the frame s pretty simple, mortise and tenon construction. Tomorrow after the glue sets I’ll round two corners and then round over one edge with the router. After that will be the tricky part of matching the finish of the tank.

Wednesday, November 22, 2006

Constructive Criticism

Well, that was pretty much the response I was expecting to yesterday’s post. In hind sight, No Grout would not be a good idea. I guess what I really mean are no grout lines that are really visible. If the tiles are butted up against each other there will always be thin gaps here and there. The tolerances on tile just aren’t that good. That would be smooshed with grout.

I must say this has been very, very helpful. It is all a part of the process. You come up with an idea. You play with it. The idea gets changed and modified, and hopefully you end up with a workable plan. In this case the plan starts with the expected results: A Vintage Looking Tiled Bathroom. From there I work backwards, looking at available resources, and ways to achieve that look.

As an example, I’ll point once again to the beautiful tile floor in the foyer of Chicago 2 Flat. I hope Jocelyn doesn’t mind me using her as an example. Anyway, click on the picture to enlarge it and look at it closely. If there are grout lines in between each tile, they are not that noticeable. Also, last week I was talking to a friend who was part of a salvage team that took a bunch of subway tile out of a local 19th Century hotel a few years back. He told me that those tiles were butted up against the other and there were no visible grout lines. I even asked him if it looked like they used grout and he said, if they did there wasn’t much.


As someone pointed out in one of the comments, by the 1920s mosaic tiles came on a backer mesh just as they do today. Someone else said the boarders came with a paper face glued to the front. This paper was remove after the boarder was set. I, of course, am doing an 1890s bathroom, so it seems it would not be appropriate to have uniform 1/8th or ¼-inch grout lines. I could be wrong, maybe there are grout lines, but I just don’t see them. A 1/8th inch grout would probably look nice. After I posted yesterday, I remembered someone else on one of the old house forums said they used pennies as spacers for the tiles. Another idea would be toothpicks.

I was very intrigued by the paper faced tile boarders. This gave me a great idea. I bolted awake in bed last night about 4:00 in the morning and had trouble getting back to sleep. I could make my own boarders before I put them down. In the Chicago 2 Flat tile, those boarders look to be about 10-inches wide (10, 1-inch square tiles). I could take pieces of cardboard about a foot wide and build my boarders on those. I could make a wooden frame out of 1X2 stock and build them like puzzles on the cardboard, maybe 3 or 4 feet at a time. Once the tiles are in place in the frame I would lay down a sheet of stencil paper, then remove the frame and start another section.

The stencil paper has a sticky side that is a little stickier than a Post-It note. You can pull it up and reuse it many times. I only need about 40-feet of boarder. I could make those up in the evening while I’m watching TV. When I go to lay the boarder, I would just slide it off the cardboard, gently smoosh it down, and then peel off the paper. Just like old times. Of course, I’d have to even them out a bit after their in place.

As for the field tile, I think someone mentioned they took an hour to do 2 square feet by hand. I can see the first few feet being tedious and time consuming. After a while though, I’m sure the pace would quicken as I reached a stride. After the boarders are in that leaves me roughly 50 sq ft of field to do. Even if I was only able to do 2 sq ft and hour, that’s still only 25 hours of work. In my mind that is very doable. Most days, when I was painting the house, I was able to get in 3 to 5 hours of work before dinner. Considering I could work longer on weekends, I can see doing the whole floor in a week!

So that leaves the mortar/thin-set debate. Right now the room has a 1-inch thick sub floor. This is the original plank sub floor and the boards are a full inch thick. They rest of 16-inch OC joists. The one transition from tile to other floors is in to the kitchen. That is a 7/8th-inch thick wood floor. There will be a marble threshold between the tile floor and the wood floor. The tile is ¼-inch thick, and if I put down a ¼-inch backer board, that would leave me 3/8-of an inch for a mortar bed. All told then, I would have an inch and a quarter floor on 16-inch 2X12 joists -That is plenty firm - and then the mortar bed with the tile. With the use of screeds I should be able to get a smooth bed. The difference in height between the kitchen and bath would be the additional mortar from the 3/16th-inch notched trowel. Extremely minor.

Well, thank you all. I’m more excited about this than ever now. As for the rotten 1950s walls, it’s hard to say how much of that can be blamed on thin grout lines. Perhaps is was a poorly done job….well, it did last 50 years, so maybe it was too bad. Let’s face it, a lot of bathrooms done in the 70s and 80s are already shot and being ripped out.

The last thing I did want to touch on was this quote.

The low cost of labor and the relative newness and lack of understanding about the physical properties of concrete didn’t hurt either. Backer board, latex additives, plywood sub floors, kiln dried joist material, ect have come a long way to rendering thick bed jobs not necessary for most typical flat floors that aren’t in a shower.

First, as far as I know, concrete was invented by the ancient Greeks and has been in use for thousands of years. I know the Romans made extensive use of. As for the debate of old building materials and methods versus new, well, who knows. I do know that my house was built in 1895 and even after decades of neglect it is structurally in far better shape than most houses built in the last 40 years. I will take any wager that my old redwood plank sub floors and joists will out last any plywood sub floor and kiln dried joist, any day of the week.

There are pros and cons to both methods of laying tile. You said, “…have come a long way to rendering thick bed jobs not necessary for most typical flat floors that aren’t in a shower”. You seem to be implying that the mortar bed method is better, it’s just not needed. Considering what I’m doing in the bathroom, this seems to be a better method.

Much more research is needed.

Edit
I just found this discussion on "mud bed" tile installations...

Mud Beds

Tuesday, November 21, 2006

How Deep Does The Rabbit Hole Go

Yet again I find myself thinking about tile. I guess I think about it so much because it will be the single biggest expense for the bathroom, but also because it will make the biggest statement. And as we all know, image is everything. For me, it is almost always going to be form before function.

One thing I’ve noticed when looking at pictures of tile work is the old tile work has little or no grout lines. Today, when you buy 1-inch hex or square, or the penny rounds they come on the sheets of mesh and the tiles are spaced evenly. This makes it very convenient to lay the tile and you get a pre-measured quarter inch grout line – or something close to that.

When I look at pictures of turn of the century tile floors, it looks like the tiles are pushed right up against each other, and if there are grout lines, they are almost non-existent. Of course, these tile floors are laid on a mortar bed, so there is a solid, impermeable surface under the tile. Modern floors are generally laid on cement backer board and thin-set. The thin set is a Portland cement based mortar and you trowel it on with a notched trowel.

I’m working on some assumptions here, because I’m not an expert tile layer, but it seems that the notched trowel method would leave some areas where there is very little thin-set between the tile and the board. Don’t misunderstand me here, I’m not suggesting the thin-set is a less effective way to keep the tile down. In fact, I’m sure quite the opposite is true. The question is one of water infiltration. With no grout, and thin-set laid with a notched trowel, water could be a problem. I'm guessing it could be, because I don't know.

If the floor tile is laid with thin-set and backer-board, but without grout lines, is it effective at keeping water away from the substrate (e.g. backer board and/or the wood sub floor). The reason I’m thinking about all this is because I thought it might be cool to do a traditional tile floor without grout lines. If so, then would the thin-set application hold up over time, or would I need to do a traditional mortar bed as well. The one and only time I’ve seen a tile shower installation go in, the first step was a mortar bed.

This, of course, adds more work to the project. Really, it adds a lot more work because it would entail me to not only do a mortar bed, but also lay all the little hex and square tiles one at a time, by hand. I wonder how long that would take? I think I have about 70 sq ft of floor space. It’s a lot to think about. This may require a trip to the library to see if I can find and old book on laying tile, and possibly a trip to a psychiatrist.

Monday, November 20, 2006

Did I Say Oak?

On Saturday I should have said “Painted Oak” when I was describing the high-tank I bought last year at a local salvage place. Grrr! Why do people paint these things. Luckily it was just one thin coat of paint over a thick layer of shellac. I can honestly say this was the easiest thing I’ve ever stripped in my life.

I think part of it has to do with the fact that it was a tank mounted 6 or 7 feet up on a wall. It probably didn’t get banged around too much up there. Stripping paint off shellacked wood can be easy when it hasn’t been dinged too much. When you bang in to a piece of wood the paint gets forced in to the grain. That’s when it’s hard to get out.

Also, I think maybe because it was oak, it may have made it seem easier to strip than other things I’ve stripped paint off of. I’m accustomed to working with redwood, and while the straight grained, old-growth stuff is hard, it still isn’t oak.

I used my patented 5 step paint stripping method.

Step 1: Heat Gun
Step 2: Jasco Semi-Paste and Steel Wool
Step 3: Boiled Linseed Oil & Turpentine
Step 4: Touch-up minor specks with artist paints
Step 5: Shellac

For Step 2 I let the Jasco sit on only one or two minutes and then rub very lightly with the steel wool. I then have a stack of paper towels waiting as I use the scraper again to gently get off the goo. The idea is to try and disturb the original finish as little as possible. If there is no paint residue left I will use denatured alcohol instead of the Jasco paint stripper.

It took me maybe 3 hours to get all of the paint off and refinish the tank. Refinishing didn’t require much because the original finish, sans shellac, was in very nice shape once I got everything off. I wiped it once with a light coat of BLO and turpentine, and then gave it a few coats of shellac. The thing looks great. There are a few chips and some minor cracks, but I decided to leave them for character.

This is just after I bought it in October of 2005


This is today after 2 coats of shellac

Sunday, November 19, 2006

Long Time No Poll

Yes, it has been a long time. What the heck happened, you ask. Well, as I’ve said time and time again, I’m basically a very lazy person. Oh, and there was the whole mad dash to finish the house painting before the weather changed.

Regardless of the reason, the weekly poll is back…..for now. The last poll - Remember, way back when? - asked about how we all pay for our obsessive house renovating. By far, the majority of us are on the go broke slowly approach and pay as we go. A daring few are using credit cards. Man, I hope those interest rates are low. Others are mortgaging their futures by spending savings and taking out home equity loans.


We have a few criminals among us. You guys totally rock! There are a few that live in fantasy land with a money tree in the backyard. No doubt fairies are doing most of the work while the home owners dream of finished projects snug in their beds.

As for the 2 people whose families are footing the bill, I just wanted to let you know that I am available for adoption. I’m quite, house trained – for the most part – and I won’t even show up for holidays if you don’t want me to. You say the word, and I’ll start the paper work.

This weeks poll deals with kids. Yesterday I was stripping some paint in the dining room, and I got to thinking how much more difficult this process would be if I had a rug-rat or 2 scurrying about. I have no doubt children are a great blessing, but when your house is ripped a apart it must be a bit of a blessing in disguise. How do you do it? On second thought, I don’t want to know. Let’s just get to the question.


Are you renovating with kids?
Yes
No
My SO/Spouse acts like a child
  
Free polls from Pollhost.com

Saturday, November 18, 2006

Testing Ballcock, Liner, Spud, and Float

Working with plumbing is hard enough when it’s all new. When you add in the dynamics of 100 year old plumbing built before standardization, you never know what you’re going to be dealing with. Today’s challenge was to test the oak high-tank for the toilet.

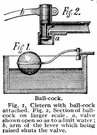
The high-tank works exactly the same as the low-tank only it’s mounted 6 or 7 feet up on the wall. I needed to make sure a few things worked properly before I started buying parts next week. First there is a copper liner I needed to make sure didn’t leak. The oak won’t hold water so the tank has a copper liner inside that holds the water. The liner passed with flying colors.

Next, there is the ballcock and valve system that fills the tank with water and then shuts off at the proper time. This works with a floating ball, in this case also copper, that is raised with the water level. As the ball raises it slowly closes a valve. Once the ball gets to a desired height, the valve closes, and the tank is ready for the next flush.


Finally, I needed to make sure the spud was in good shape and could seal properly. The spud is a threaded pipe with a flair at one end. It goes through a hole in the copper liner and the oak tank. There is a rubber gasket inside the tank that creates a seal when a nut is tightened down from the outside of the tank. Essentially, the oak, copper liner, and then the rubber gasket are squeezed between the nut being screwed on to the pipe underneath, and the flair at the top of the pipe inside the tank. Next, the flush tube attaches to the threaded spud under the tank and it leads to the toilet.

Artists Rendition


The gasket was shot, but that was easy to replace. The problem arose when I tried to get a slip nut that would screw to the spud. I would need a slip nut to attach the flush tube. I still need to buy the flush tube, and it will come with it’s own slip nut, but I had to make sure the threads are modern standard plumbing threads. They are not.

The spud looks just like an inch and a half threaded pipe but the spacing on the threads is a little different. A new inch and a half slip nut will make it about a half of a turn before it binds up. I had a very similar problem with the other toilet I installed upstairs. I think it was in the 20s or 30s when threaded pipe for plumbing became standard. Anything before that seems to be a shot in the dark.

So, this was a good exercise. When I order plumbing parts in a week or so I can add a new inch and a half spud for the toilet tank.

The tank


What ever floats your float


Rube Goldberg would be proud

Friday, November 17, 2006

It Still Counts As Work

I’ve spent countless hours on-line sourcing materials for the bathroom. Not to mention lots of time spent driving around town to look at other items. I love browsing and searching on-line, but after a few weeks of this I’m really getting a little tired of it now. I’ve pretty much settled on the subway tile from Subwaytile.com. I’m going to do without the cap and just get field and base from them. I can then use the same 1X3 fluted wooden cap I used in the kitchen.

I bought the sink legs off Ebay, and I sourced the wall brackets for the legs, but I’m not feeling good about it now. I wrote back to Don at Vintage Plumbing asking him where I should send the check, and who do I make it out to. He gave me the information and then said he would have to find a pair for me. Apparently he has had them made, but may not have a pair right now. It’s only been a few days, so it’s not time to panic.

I bought the faucet from Van Dykes Restorers, but that will most likely be returned now. DEA Bath is supposed to email me pictures of 4 or 5 vanities that fit my needs. I probably won’t get the pics until early next week, but then I can finally put the whole vanity decision to rest once and for all.

I spent most of yesterday making out a rather long, and what will no doubt prove to be an expensive parts list of things I will need from DEA Bath. Some of it will need to be nickel plated, and they will do that, but I need to tell them what I want so it will be ready when I go down in a two weeks. Two weeks is the plan, but you know how plans go. Once I got the list together, I naturally had to compare prices at several different sites on a few of the common items. That meant a lot more clicking and reading. I got the HAJOCA toilet from my neighbor, and I got a great deal on the oak tank last year, so that saved me several hundred dollars right there. Whew!

The floor tile samples came from Lyric last week, and I’m not overly thrilled with what came. The tile is a nice, perfectly square edged mosaic tile, but now I’m not sold on the styles. I got a sample of the polka dot, 1-inch hex, and the pinwheel (squares and rectangles). Both are black and white. Then I saw these two samples from a few HouseBloggers and said, “Yes! That’s what I want!” I’m going to do my best not to out-right steal either of these designs, but I make no promises.

Chicago 2 Flat


Top to Bottom


I lost out on a few EBay auctions for lighting over the past few weeks. I always lowball on bids when I first start shopping for something on Ebay. It gives me an opportunity to see what things are selling for, and you sometimes get lucky and get the deal of the century. That happened this time. I was over bid on a few auctions but I ended up with a vary nice pair of 1890s wall sconces with etched glass shades. Or at least I hope they’re nice, as I don’t have them yet. They have been rewired and looked to be in good shape. I got the pair for $86 with shipping. That almost makes up for what I paid for the sink legs – don’t ask.

I’m still searching for a ceiling fixture, and other things like towel rods and toilet paper holders. I bought a nice pair of nickel plated brass shelf brackets from a shop locally. I don’t have a picture, but it is a pair of brackets that supports a glass shelf. I also picked out a really cool 3-arm swinging towel bar, also nickel/brass. It was missing a nut and I should be able to get it soon.

There is still a lot of generic purchases to be made locally, but the hard stuff to either find and/or decide upon has mostly been done at this point. Now I just have to buy it all. That will be spread out over the next few months. Most of it is not too bad, except the tile…..oh, the tile.

Thursday, November 16, 2006

Is a Vanity in the Hand….

Worth two in the bush, or in this case, several in Murphys, Ca. That is the question I’m grappling with.

It’s a bit convoluted, so please pay attention. There is an antique marble vanity top with sink here in town that I could buy right now. There are 2 issues with it, one minor and one major. The minor issue, or so I’ve been told it’s minor, is some rust stains. They aren’t too bad, but bad enough that I would need to get them off or it would drive me nuts. I’ve been told I can use a poultice of Cream of Tar Tar and Hydrogen Peroxide to leech the stains out of the marble. A good friend told me about this, so I’ll assume it’s true. This is what makes the stains the minor issue.

Still, the stains are a big minor issue, if there is such a thing.

The second issue – the major issue - is the faucet. It doesn’t come with one, but that’s not the issue. This vanity was set up for a mixer faucet as opposed to a separate hot and cold faucet. Normally you would think that was a plus, but in this case it presents a few problems. First, there is a serious lack of Victorian mixer faucets to chose from. In fact, I really only found one. It is at Van Dykes Restorers and the quality is poor. The other problem with this particular faucet is that it does not come in shiny nickel, only in shiny brass and oil rubbed bronze.

You wouldn’t think the issue of the faucet not coming in shiny nickel was a big issue, but it is. I used to say I don’t want to live in a museum when secretly it’s what I’ve desired along. I’ve always liked the unusual and slightly out of style. It is not uncommon in my life for me to take things to their extreme. Or at least close enough to the edge that it’s obvious I went a little too far. In the upstairs bathroom I went with chrome on the faucets and it’s bugged me ever since. The faucets are the only metal things in the room that are not nickel plated and they stick out like a sore thumb. I’m not going to make that mistake again.

I went ahead and bought the faucet from Van Dykes anyway and it came yesterday. The main reason to buy it was to see it in real life, but also to see if it would fit the single hole already drilled in the vanity. It does not. So now I’m faced with needing to drill out the hole. I actually have experience in this so it’s not as daunting as it might have seemed a few months ago. Still, it is one more issue. It is one more thing to worry about, and one more thing that could potentially go wrong.

I bought the faucet in oil rubbed bronze for the primary reason that I know I would never install an oil rubbed bronze faucet in the bathroom. I’m forcing my own hand to either not use it or get it nickel plated. So I started calling around to platers yesterday to see about getting it nickel plated. So far I’ve gotten one bid of $85 and I would have to ship it to them, so really it’s $100. Twice on the phone I had to correct the guy that I wanted nickel plating and not chrome. Visions StoccoHouse type plating problems started going through my head. The more I think about this the less I like it. It’s just more hassle of what will already be a big project.

The other option is to select from one of the marble vanities at DEA Bath. There are a few 2 hole vanities to chose from, and I have a tentative agreement with DEA Bath to take some of my unwanted vintage toilets and sinks in exchange for store credit. In effect, I would be trading toilets for a marble vanity. The issue here is, I have to drive to Murphys, CA, which is about 6 hours, one way. It’s not the end of the world and the drive would do me good.

The other issue is, I would have to pick out the vanity in one day. I usually like to mull these things over, write about it on the blog, change my mind a few times, and then pick something out. This will be a blurry-eyed, over-night, Cannon Ball run to Murphys, CA. ending with me making a crucial decision through a caffeine induced haze. Not ideal conditions.

Then, of course, there is the old “bird in the hand” thing. The vanity that is here in town, is here in town. If I say no to it, and it gets sold, that’s pretty much it. I need to make a decision on the vanity before I start the rough-in on the plumbing. What happens if I get to Murphys, CA and there’s nothing I like. So the question is, do I buy something that I don’t really like just because I can (the vanity here in town), or do I take a chance at what’s behind Door Number 2?

I’ve told the shop here in town that is holding the vanity that I would give them a yes or no within 2 weeks. If someone else is interested in it before 2 weeks is up, they will contact me and I will give them a yes or no immediately.

At this point, I’m leaning towards What’s Behind Door Number 2.

Wednesday, November 15, 2006

Well, that was easy, but not cheap

I started what I thought would be a long, arduous, and painful process of trying to find a pair of apron wall brackets to go with my new sink legs. As I mentioned yesterday, I bought a pair of 1890s sink legs on EBay for the new bathroom.

The legs support a marble apron at the outside corners of the vanity and there should be a pair of small brackets that mount to the wall to support the opposite end of the apron. These inevitably get tossed or left behind because people either don’t know what they are, or they just loose them. This is the same reason there are a zillion cabinet latches and rim locks out there without the catches. These parts may seem small and insignificant, but they are a crucial part of the item whether it be a cabinet latch, rim lock, or sink leg. It's like having an old car with no window cranks.

Anyway, I’ve been playing around with ideas about how I could mount the sink and apron without the little wall brackets. A few ideas came to mind but they mostly seemed like hack-jobs. Anybody that knows me, knows that I’m normally not opposed hack-jobs and work-arounds. Hell, “The King of Work-Arounds” could be my epitaph. In this case though, this sink will be very heavy when it’s in place. This is not hack-job territory. It should be secured properly to the wall. I don’t want to have a $1000 worth of antique plumbing crashing to the ground because I was too cheap to do it right.

Then last night I thought about the site I had found mentioned in a few of 1902 Victorians musings on dreamy Victorian bathrooms. There is a place in LA (I think) called Vintage Plumbing. This is the place that has the $7,600 marble vanity. I found their site and shot off an email last night shortly after 9:00 at night. About 10 minutes later I heard my laptop ding-a-ling at me indicating new mail had arrived. It was Don from Vintage Plumbing. This guy is hard-core if he’s answering obscure questions on antique plumbing at 9 o’clock at night on a Tuesday.

Sure enough he had what I was looking for, only they weren’t original antiques. Apparently I’m not the only person who has had this problem. I guess it’s so common, or at least common among lunatics who buy antique sink legs, that Don has his own made out of nickel plated cast brass.

The brackets are about 5-inches high and about an inch wide. At $135 for a pair I’m going to need a bullet to bite on when I write that check. Ouch!

Tuesday, November 14, 2006

Bathroom Jewelry

This is the first of what will be many purchases for the downstairs bathroom over the next few months. In other wards, I’m going to be broke over the next few months as I pour more money in to the house. I keep telling myself it’s an investment, and I guess it is, but it still stings a bit.

Anyway, enough belly-aching and on with the show and tell. These are my latest Ebay treasure. They are a pair of 1890s nickel plated, brass sink legs. First is a picture of the of the legs I bought and then a picture I found on-line of how they are used.


Notice in the picture how the sink legs support a marble apron, which in turn supports the marble vanity. What I don’t have are the nickel/brass wall supports for the apron. If I can’t find any, or make any, I’m thinking I could support the apron in a notch in the wall tile, like one would support floor joists in a brick or stone house.

On the back of the angled parts, at the top of the sink legs, where the marble sits, there are threaded fittings which will hold a bracket so the legs can’t separate from the apron.


On the bottom of the legs, as you can see in the picture above, there is a stud that will go in to a hole in the tile floor. This keeps the leg from being kicked out from under the sink. What all of this means is, I’ve pretty much committed myself to a marble vanity.

I have 2 that are being held for me right now. One is local, at one of the shops. There is an issue with the faucet and some stains, that I won’t go in to now. The other one is at an on-line site. There are issues there as well, that I won’t go in to. Hopefully some things can be resolved in the next week or two and I will have one of the vanities with a sink.

After that I’ll need the marble skirting. Those will be just 3 pieces of marble with no fancy mill work, so I can get that locally from the same place I got the slab for the kitchen. Both of the vanities I’m looking at are the same white Carrara marble, so it shouldn’t be too hard to get a good match.

It’s going to be a challenge to get this all put together without it being crooked or anything. I’m getting nervous about it already, but if it comes out nice, it should look pretty neat. If it doesn’t, I can always sell the house, right?

Oh, and notice the tile in the bathroom picture. This is pretty much what I'm shooting for. I like the white hex with the white square boarder. Those may even be 1X2 rectangles in a staggered running bond on the boarder. It's simple, and plain in a way, but I really like it.

Edit: The Victorian Toilet with the shell motif listed on Ebay that I wrote about in yesterday's post sold for $1,375.00! As I said, too rich for my blood.